How to make advanced animations in the Figma Motion plugin
Today, we will learn how to use advanced tools to easily animate complex scenes.
First, let’s talk a little about what tool we will use. You can use presets animation, keyframes animation, path animation or link animation for layer properties. We will deal with links. This is a very simple and powerful tooling in Motion.
Overview

You can link layer properties with another layer properties via equations. The source layer properties may have keyframes, paths or links.

The link animation duration is equal to the source layer total animation.
Adding a link
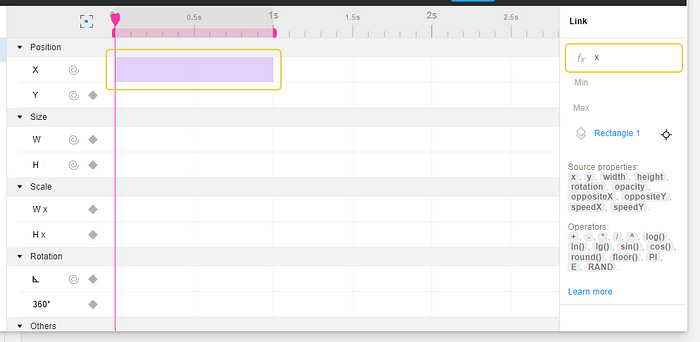
To link some layer properties with another layer properties, just click on a wisp icon. Then select a source layer and click OK in a popup dialog. The link will be added.

You can change the source layer later.
Equation
You can define dependency via an equation in fx text field.
You have access to the source layer properties like x, y, width, height, rotation and opacity. More than that you can use oppositeX, oppositeY coordinates and speedX and speedY properties.
There are some operators you can use like +, -, *, /, ^ (exponentiation), log, ln, lg, sin, cos, round, floor, PI, E, RAND (from 0.0 to 1.0).
Note: oppositeX = (x+width*sin(rotation*PI/180)), oppositeY = (y+height*cos(rotation*PI/180)), where x and y are the coordinates according to the anchor point.

Min/Max values
You can set min and max values of the calculated value.
Examples
Let’s see how it works with help of some examples. Download the file in the Community to start these tutorials. In the file you will see Sandbox, Ready and Components pages. We will work with Sandbox and Ready.
Moving
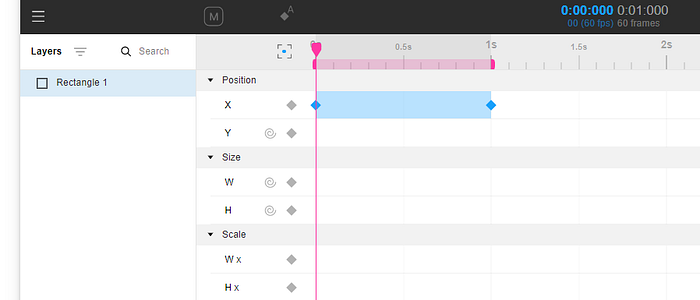
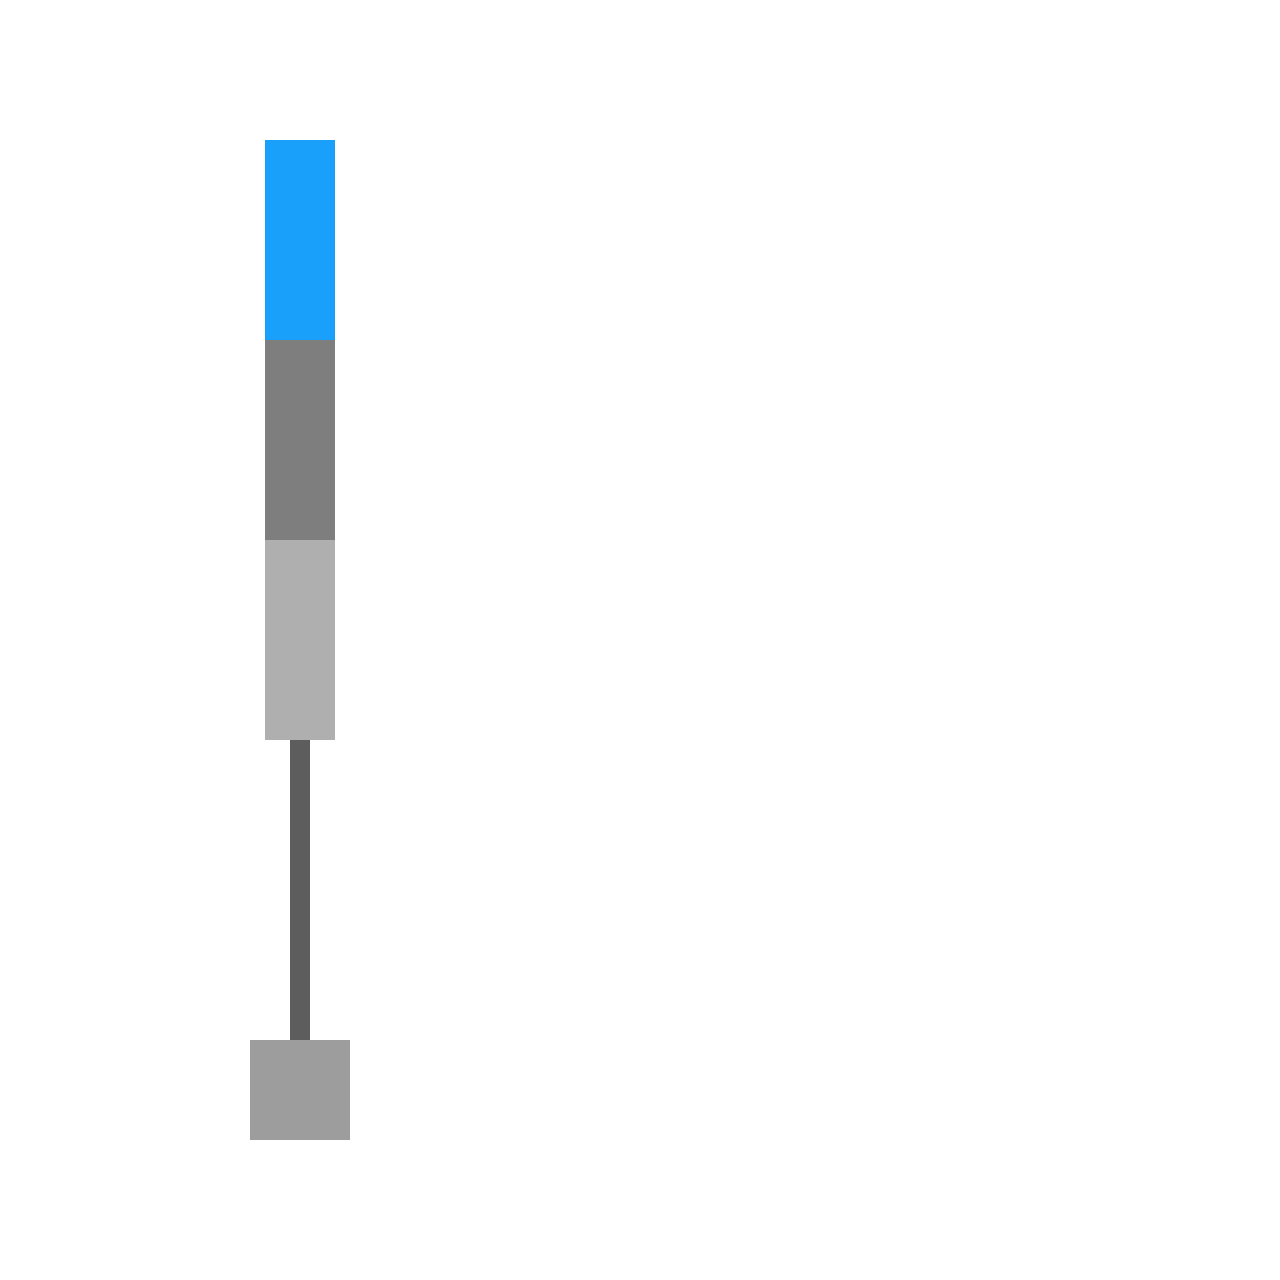
Go to the Sandbox page, open Motion and click on + icon to add a new animation.
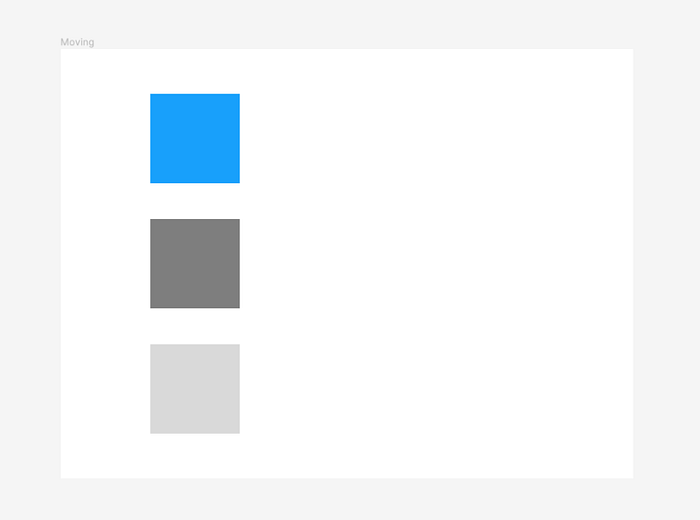
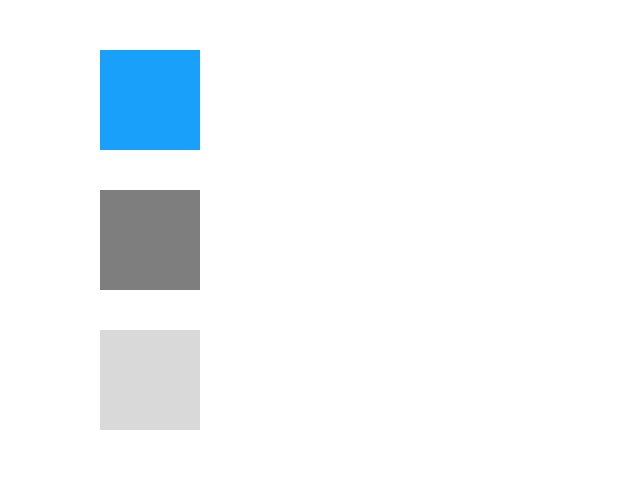
Select the blue rectangle and add 2 keyframes for X property to the first rectangle. The keyframes values doesn’t matter. The rectangle should move right, for example.
Then select the next rectangle and click on a whip icon for the X property. You will be asked to select the source layer to link.
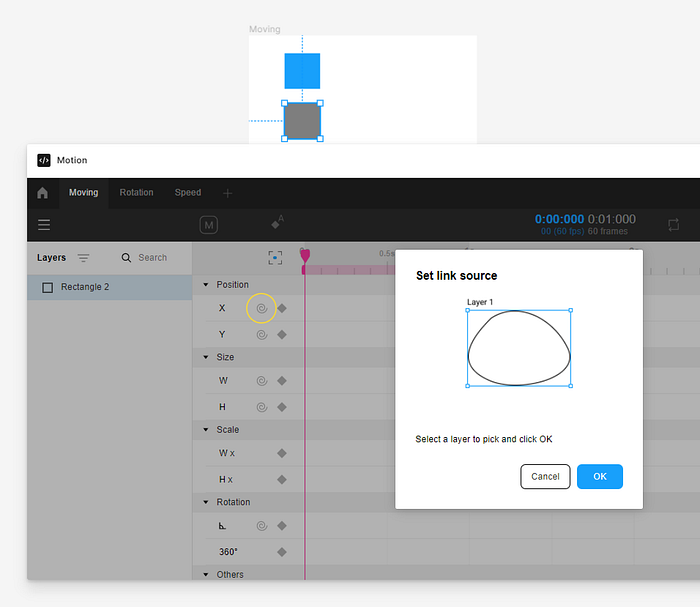
Select the first rectangle and click on OK button.
Click on Play button, and you will see 2 rectangles moving.

Congrats! You have just created your first link!
Select the second rectangle link for the X property, and you will see the equation equal to x in the link properties panel. It means that it takes the source layer (your first rectangle) position X and set it to the second rectangle.
Try to change it and see what will happen. Write any formula you want to see how it will effect on your animation.
You can change the first rectangle X animation the way you want and the second rectangle will move according to the calculated equation.
It is super easy and super powerful!
Next, we changed the second equation to x*1.2–30. Then we added a link to the third rectangle with the source layer equal to the second rectangle and set its equation to x/2+75. Here is the result. The rectangles are moving starting the same position X and moving differently.
If you have some problems with these tutorials, select Moving animation and check what you are doing wrong.
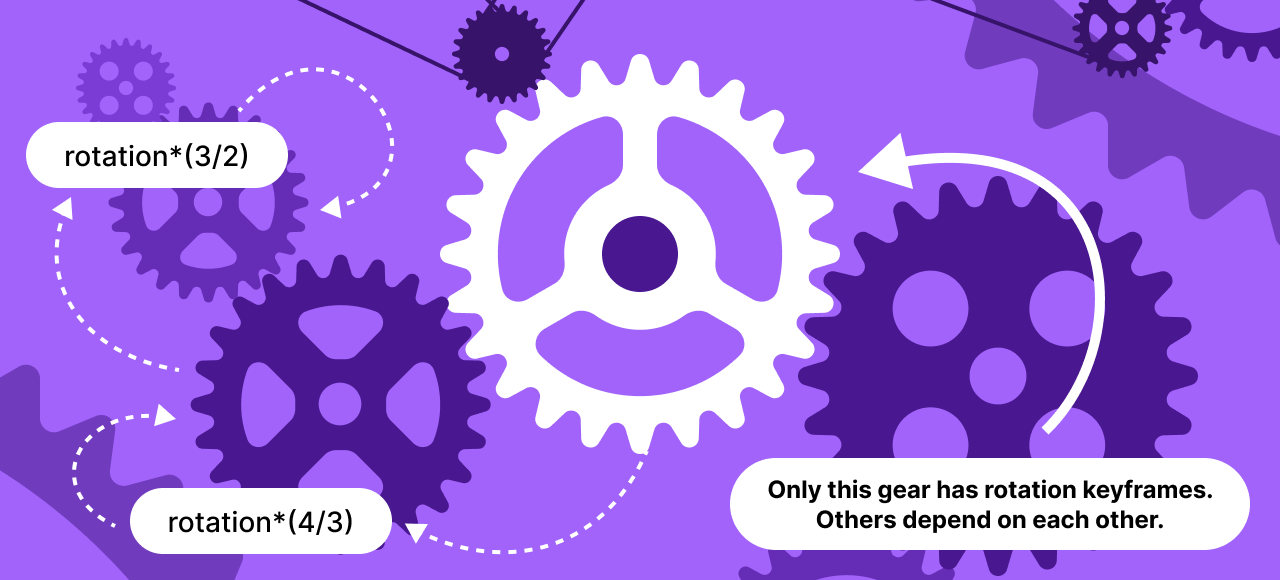
Rotation
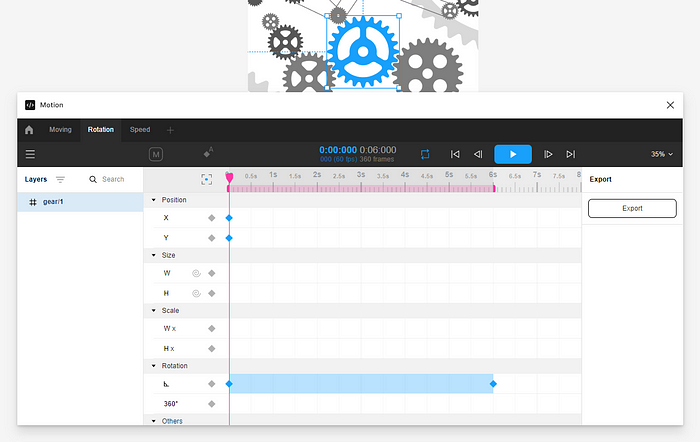
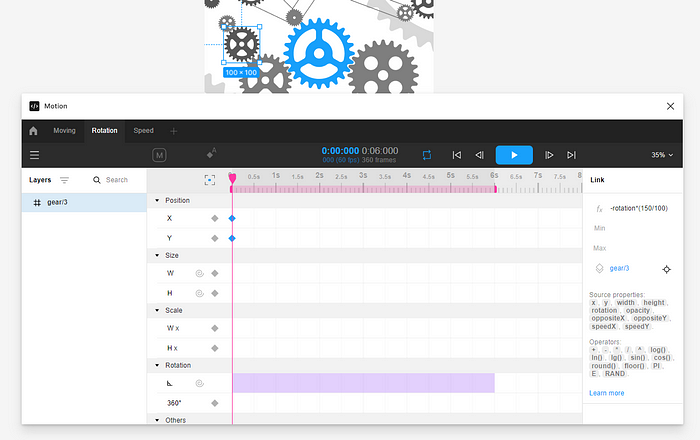
Let’s go to a more complex example. Here we have a lot of gears which have different sizes. We will add Rotation keyframes to the center one, and others will be linked to each other by some equations.

Go to the Sandbox page, open Motion and click on + icon to add a new animation.
Select the blue gear, add at least one X and one Y keyframes. Remember, that you have to do it if you deal with Width, Height or Rotation. You have to fix the layer position this way.
Now, we are ready to rotate them. Select the blue gear and add a Rotation keyframes to it. Suppose, it will rotate from 0° to -360° during 6s.
You will have something like this.
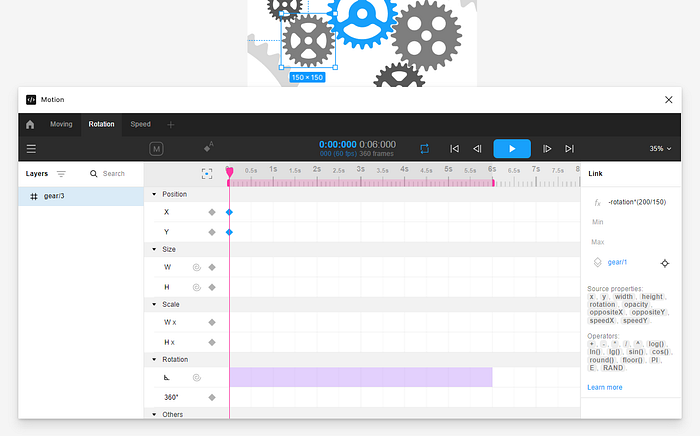
Select the next gear. Add a link to the first gear for the Rotation property with the source layer equal to the first gear.
The first gear has dimensions equal to 200x200, the second — 150x150. The second gear should rotate faster then the first one. So, we need their sizes’ ratio, which is calculated by 200/150. More than that, the second gear should rotate the opposite direction. So, we need -rotation. The result equation is -rotation*(200/150).
You will have something like this.
Click on Play button, and you will see 2 gears moving.
Let’s select the third gear and link it with the second one. Their sizes are different too. So, we have -rotation*(150/100) equation.
Click on Play button, and you will see three gears moving.
We have a lot of gears more. You can link them together with the equation we used before.
The result will be like this.

If you have some problems with these tutorials, select Rotation animation and check what you are doing wrong.
SpeedX and speedY
Motion can calculate the speed of the layers. You can use it.
Go to the Sandbox page, open Motion and click on + icon to add a new animation.

Here we see two rectangles. Add two keyframes for the X property to the blue one. It should move right, for example. Set the second keyframe easing to Ease In Out.

Now, select the second rectangle and add links for X and Width properties with the same source layer equal to the first rectangle. We add X moving just for the move realistic example. Motion will takes the source layer speed indepently on any other keyframes and links added.
Let’s set the second rectangle Width link equation to 100+speedX*50.
Click on Play button, and you will see 2 rectangles moving, and the second one will be stretching according to the speed of the first rectangle.

If you have some problems with these tutorials, select Rotation animation and check what you are doing wrong.
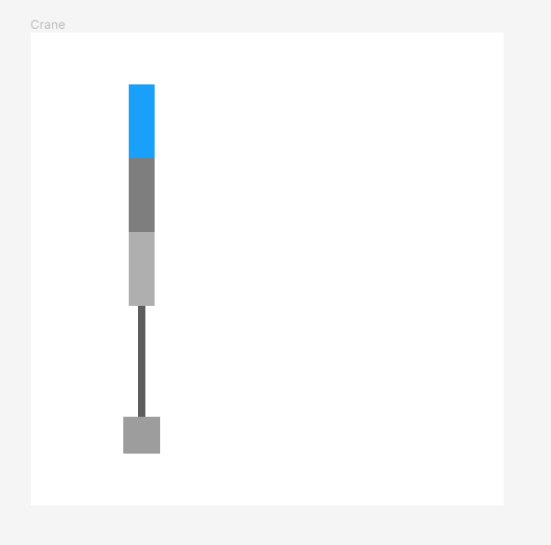
Animating a crane
In this tutorial, we will animate a crane lifting a box. Only its first hand will have keyframes for Rotation. Other layers will be linked to each other.
Go to the Sandbox page, open Motion and click on + icon to add a new animation.
Select the blue rectangle. First, we have to set the anchor point to 50% vertically and 0% horizontally.
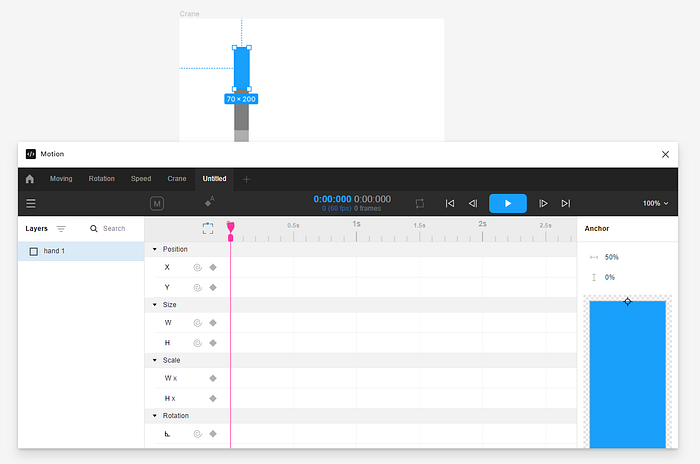
Now, we have to fix its position by adding at least one keyframe for X and one keyframe for Y properties. Then add two keyframes for Rotation from 0° to 90° with total duration equal to 1s. Set the second one keyframe easing to Ease Out (Back). It will look like more attractive.
Click on Play button, and you will see the blue rectangle rotating.

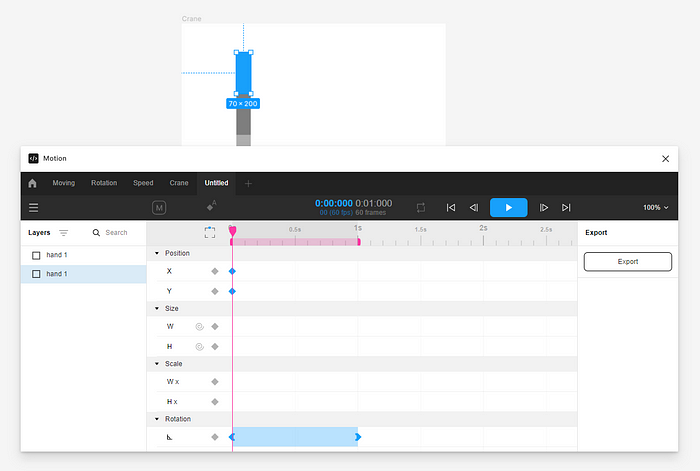
Now, we will the link last rectangles to each other.
Select the next rectangle. Set its anchor point the same as the previous rectangle. Add a link to the previous rectangle. You should link X, Y and Rotation. The equations are: X = oppositeX, Y = oppositeY, Rotation = rotation/2.
Click on Play button, and you will see 2 rectangles rotating.
Select the next rectangle and repeat all the steps for it. You should set an anchor point and link to the previous rectangle. The equations are the same.

Now, we have a flexible rope. Let’s use the speed of the previous rectangle to stretch it. Set its anchor point and X and Y properties like we set before.
Add another links to the previous rectangle with equations: Height = 300-speedY*100, Rotation = -speedX*10.

Select the last rectangle. Set its anchor point and X and Y properties like we set before.
Add another link to the previous rectangle with equation: Rotation = -speedX*20.

Congrats! You have animated a crane using advanced techniques like links.
Conclusion
These were just a simple examples of how you can use links for making advanced animations. You can make a really complex animations with just a few clicks.
Read this article to learn how to improve your animation with paths.
Try to make your own animations and share them on Twitter or Facebook with the #motion or #motionplugin hashtags.